TL;DR
Natural release lets pressure drop on its own, adding extra cooking time; quick release vents steam immediately, stopping cooking fast. Choosing the right method affects tenderness, moisture, and overall doneness.
Ever opened your pressure cooker to find your roast tougher or your vegetables mushy? The secret isn’t just in the ingredients — it’s how you release the pressure. Whether you’re cooking a hearty beef stew or delicate fish fillets, understanding natural vs quick release can make or break your dish.
In this guide, I’ll show you exactly what each method does, why it matters, and how to pick the right one every time. Prepare to see your pressure cooker in a whole new light — it’s all about timing, and release method is a big part of that.
Always consider release method as part of your total cooking time — it affects doneness and texture.
Use natural release for large meats, beans, and grains to keep dishes tender and moist.
Quick release is perfect for vegetables, seafood, and delicate foods to prevent overcooking.
Never force open a lid before pressure drops; safety depends on proper venting.
Hybrid methods, like 10-minute NR then QR, give the best of both worlds for many recipes.
Natural vs Quick Release
The timer reaching zero is not always the end of cooking. How you release pressure determines tenderness, moisture and doneness—and can turn the same ingredients into a juicy success or a mushy disappointment.
minutes before the cook timer starts
approximately 121°C
psi above atmospheric pressure
psi; timing may need adjustment
One keeps cooking. One hits the brakes.
Natural release is an active finishing phase. Quick release is a deliberate stop. Choose according to the food—not simply according to how hungry you are.
Natural Release
Turn off the heat and leave the cooker alone. As the pot cools, pressure falls gradually and the float valve drops on its own.
- Continues gentle residual cooking
- Helps meat stay moist and tender
- Reduces foaming and liquid spray
- Supports flavor melding and resting
Quick Release
Move the valve to venting or press the release button. Steam escapes rapidly, pressure drops and cooking stops within minutes.
- Protects delicate food from carryover heat
- Preserves vegetable color and firmness
- Works well for seafood and pasta
- Requires care around the steam plume
Natural release duration
A full six-quart cooker commonly needs 15–25 minutes and may take up to 30.
Quick release duration
Manual venting usually drops pressure in only 1–3 minutes.

Cosori Pressure Cooker 6QT, 9-in-1, Ceramic Coating Pot, 12 Safety Features
𝟵 𝗠𝗮𝗰𝗵𝗶𝗻𝗲𝘀 𝗶𝗻 𝟭: Pressure Cook, Rice, Steam, Sterilize, Oatmeal/Porridge, Stew/Broth, Bean/Grain, Meat/Poultry, Slow Cook, Sauté, Ferment, Sous…
As an affiliate, we earn on qualifying purchases.
As an affiliate, we earn on qualifying purchases.
Match the release to the result.
The wrong choice can leave a large roast underdone, force moisture from meat or turn fast-cooking vegetables into puree.
| Feature | Natural Release | Quick Release |
|---|---|---|
| Typical time | ✓10–30 minutes | ✓1–3 minutes |
| Cooking effect | Continues cooking gently as temperature falls | Stops cooking almost immediately |
| Best texture | Tender, rested and moisture-retaining | Firm, bright and protected from overcooking |
| Best foods | Large meats, beans, grains, soups and stocks | Vegetables, seafood, pasta and delicate foods |
| Main risk | ~Delicate food may overcook | ✗Starchy liquid may spit or foam |
| When rushed | Skipping it may leave large cuts underdone | Using it on meat may produce tougher, drier fibers |

Steam Release Valve Handle Replacement for Instant Pot Duo/Duo Plus 3, 5, 6 and 8 Quart, Mini 3 Qt, Duo50 5 Qt, Duo/Duo Plus 60 6 Qt, and Duo/Duo Plus 80 8 Qt
✔ | WIDE COMPATIBILITY | – This steam release valve handle compatible with all Instant Pot Duo models,…
As an affiliate, we earn on qualifying purchases.
As an affiliate, we earn on qualifying purchases.
What are you cooking?
Dense, foamy and slow-tenderizing foods favor patience. Delicate foods favor speed.
Roasts & briskets
Slow pressure reduction supports even heat distribution and gradual connective-tissue breakdown.
Use natural releaseBeans & legumes
Gentle depressurization limits foam movement and helps keep the valve clear.
Use natural releaseGrains & oatmeal
Resting allows liquid to settle and lowers the risk of hot starch spraying through the vent.
Use natural releaseVegetables
Rapid venting stops carryover cooking and protects color, structure and bite.
Use quick releaseFish & seafood
Immediate pressure reduction prevents fragile proteins from becoming dry or rubbery.
Use quick releasePasta
A prompt release protects firmness, but use caution if the pot contains abundant starchy liquid.
Use quick release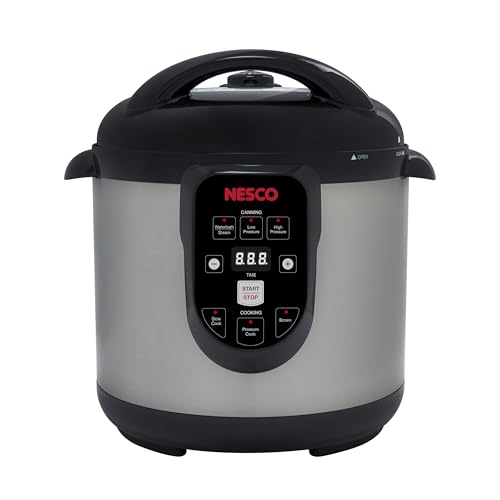
NESCO NPC‑9 Smart Electric Pressure Canner and Cooker for Home Food Preservation, 9.5‑Quart Stainless Steel with Digital Controls
DEDICATED ELECTRIC PRESSURE CANNING WITH BUILT‑IN SAFETY CONTROLS automatically regulates pressure and temperature, helping home canners confidently preserve…
As an affiliate, we earn on qualifying purchases.
As an affiliate, we earn on qualifying purchases.
The cook button shows only one piece.
Total recipe time includes heating, pressure cooking and release. Beginners often underestimate dinner time by ignoring the first and final phases.
Come to pressure
Usually 5–15 minutes, depending on volume and temperature.
Timed pressure
The programmed cook time begins after pressure is reached.
NR, QR or hybrid
This phase controls residual cooking and final texture.
Float valve drops
Only then is the lid unlocked and safe to open.
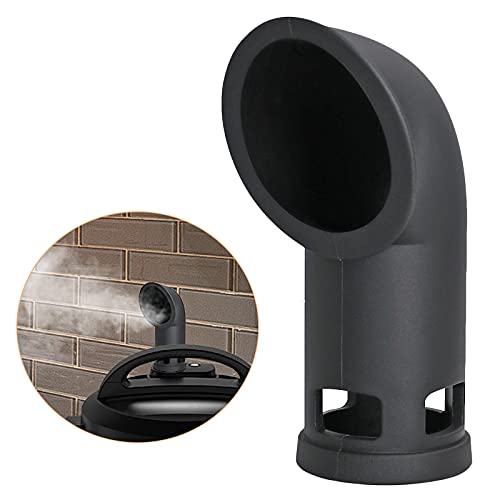
Steam Release Diverter, Pressure Cooker Accessories – Silicone Steam Diverter Kitchen Cupboards/Cabinets Savior (DUO/Smart)
Necessity – Our diverter is perfect accessories for your cooking pots. Keep pressure cooker steam away from your…
As an affiliate, we earn on qualifying purchases.
As an affiliate, we earn on qualifying purchases.
Ten minutes natural, then quick.
A timed natural release gives food a gentle finish before quick venting prevents the residual heat from going too far.
A strategic two-stage finish
Leave the cooker untouched for 10 minutes after the timer ends. Then carefully vent the remaining pressure. This method works especially well when meat needs a short rest but accompanying ingredients still require texture control.
Pressure decides when the lid opens.
Never override the cooker’s pressure-locking system. The float valve—not the clock—is the final safety signal.
Wait for the float valve to drop
Pressure must fully equalize before you attempt to turn or lift the lid.
Keep clear of the steam path
Keep hands, arms and face away from the vent during quick release.
Use a long utensil when appropriate
On compatible stovetop models, use tongs or a wooden spoon to operate the valve from a safer distance.
Cover the valve with a towel
Fabric can obstruct venting, trap steam and interfere with the cooker’s safety design.
Three rules for confident cooking.
When the recipe is unclear, use the food’s density, starch level and sensitivity to overcooking as your guide.
What if the recipe does not specify a release?
For most savory dishes, begin with a 10-minute natural release, then vent. Choose immediate QR for delicate ingredients and full NR for large, dense or foamy foods.
Why is my natural release taking so long?
Full pots, dense ingredients and high liquid volume retain heat longer. A large electric cooker commonly needs 15–25 minutes to depressurize naturally.
Can natural release be sped up?
Switching to venting changes the method to quick release. Never force the lid. If timing matters, choose QR only when the food and liquid are suitable for it.
What Are Natural and Quick Release? The Quick Explanation
Natural release (NR) and quick release (QR) are the two ways you let pressure out of your cooker once the cooking time ends. With natural release, you simply turn off the heat and wait, letting pressure fall on its own. This gradual reduction allows the food to continue gently cooking in its own residual heat, which can help tenderize meats and meld flavors. It also provides a safety buffer, reducing the risk of hot liquid and steam suddenly escaping.
In contrast, quick release is a rapid, manual venting process. You open the steam valve or press a button, causing the steam to escape quickly within 1 to 3 minutes. This sudden drop in pressure halts the cooking process immediately, which is ideal for foods that can overcook or become mushy if left longer. The choice between NR and QR isn’t just about convenience; it impacts the final texture, moisture retention, and safety of your dish.
Why Your Choice of Release Method Changes the Entire Cooking Time
Most home cooks overlook that natural release isn’t just waiting — it’s an active part of the cooking process. During this time, the internal temperature of the food continues to rise slightly, and residual heat helps tenderize proteins and meld flavors. For instance, a large beef roast benefits from this gentle cooking phase because it allows the connective tissues to break down gradually, resulting in tender, juicy meat.
On the other hand, quick release abruptly stops all cooking activity. If a recipe calls for natural release but you opt for QR, you risk undercooking larger cuts or overcooking delicate foods that need that gentle finishing phase. Conversely, using NR unnecessarily can extend cooking times longer than needed, potentially drying out meats or over-softening vegetables. Recognizing the implications of your release choice helps you control the final texture and doneness more precisely.
Side-by-Side Comparison: When to Use Natural vs Quick Release
| Feature | Natural Release (NR) | Quick Release (QR) |
|---|---|---|
| Typical time | 10–30 minutes | 1–3 minutes |
| Best for | Large meats, beans, grains, soups | Vegetables, seafood, pasta, delicate foods |
| Effect on food | Continues gentle cooking; keeps meat moist and tender | Stops cooking immediately; preserves the original texture and prevents overcooking |
| Risks | Overcooking if left too long, especially for delicate foods | Foam or spitting with starchy foods; underdone large cuts if rushed |
The Food-Based Cheat Sheet: Which Method Works Best
Different foods require different pressure release strategies to optimize texture and safety. Here’s a detailed guide:
- Large meats (roasts, briskets): Use natural release to allow collagen to break down slowly, resulting in tender, juicy meat. Rushing this step can leave meat tough or dry.
- Beans and grains: Natural release prevents overcooking and reduces foam or spattering that can clog vents, ensuring the dish remains intact and safe.
- Vegetables and seafood: Quick release helps maintain their delicate textures by stopping cooking immediately, preventing mushiness or over-softening.
- Pasta and delicate foods: Quick release locks in their firmness and prevents overcooking, keeping the dish vibrant and fresh.
- Foamy foods (beans, oatmeal): Avoid quick release because rapid venting can cause foam and liquid to spray out, creating a mess and potential safety hazards. Natural release is safer and more effective here.
The Middle Ground: The 10-Minute Natural Then Quick Method
Many recipes suggest a hybrid approach: 10 minutes natural release, then quick release. This technique allows the food to continue gently cooking and tenderizing during the natural phase, then rapidly halts the process to preserve the final texture. For example, after cooking a pot roast under pressure for 20 minutes, letting it rest for 10 minutes naturally ensures even heat distribution and breakdown of connective tissue, resulting in juicy, tender meat. Following this with a quick release prevents overcooking delicate vegetables or finishing the dish with a crisp, fresh texture.
This method offers a strategic balance: it leverages the benefits of both techniques, minimizing the risk of overcooking while ensuring thorough cooking and flavor development. It’s especially useful for recipes where timing precision and texture are critical, giving you greater control over the final outcome.
Safety First: Do’s and Don’ts When Releasing Pressure
Safety is non-negotiable. Never attempt to open the lid before the float valve drops, as this can cause dangerous steam explosions. Always wait until the pressure has fully released naturally or use the quick release method carefully. During quick release, keep hands and face away from the steam vent to prevent burns. Use a long utensil or handle to flip the valve on stovetop models—never use your hands directly.
Don’t cover the vent with towels or cloths — this can block steam escape, leading to dangerous pressure buildup or damage. Be aware that full pots take longer to naturally release pressure, so plan your timing accordingly. Rushing or forcing the lid open before pressure drops can cause hot liquid or steam to spray out unexpectedly, risking burns and messes. Prioritizing safety ensures a smooth, injury-free cooking experience.
FAQs: Your Burning Questions Answered
How do I know which release method a recipe requires?
Always follow the recipe instructions closely. If the method isn’t specified, a good rule of thumb is to start with 10-minute natural release for most savory dishes, then switch to quick release if the recipe involves delicate ingredients or needs to be served immediately. Adjust based on the type and size of ingredients, as well as personal texture preferences. Recognizing the food’s nature helps you decide whether gentle residual heat or rapid stopping is best.
How long does natural release take?
Natural release typically takes between 10 to 25 minutes for most recipes. Larger or fuller pots may require closer to 30 minutes, especially if the ingredients are dense or the liquid content is high. Smaller quantities or foods with less connective tissue tend to release pressure more quickly. Planning for this time ensures you don’t rush or delay serving your dish.
Can I speed up natural release?
No — attempting to force the pressure out by turning the valve or opening the lid prematurely can be dangerous. If you need your dish sooner, opt for quick release instead. Forcing pressure release can cause hot liquid or steam to spray out violently, risking burns and equipment damage. Patience is key to safety and quality.
Why did my meat turn out tough or dry?
This often results from using quick release on large, collagen-rich cuts or stopping natural release too early. Natural release allows residual heat to continue breaking down connective tissues, making meat tender and juicy. Cutting this process short traps moisture and can leave meat tough. Understanding when to use each method ensures your meat stays moist and flavorful.
Why does foam or liquid spray out during quick release?
This occurs when starchy foods like beans or oatmeal are overfilled or when rapid venting agitates foam that has formed. Foam expands and can escape forcefully, creating a mess or safety hazard. To prevent this, avoid quick release for recipes prone to foaming, and always follow recommended fill levels. Using natural release in these cases keeps the process safer and cleaner.
Conclusion
Think of pressure release methods as a crucial ingredient in your cooking. They shape the texture, moisture, and flavor of every dish. The next time you set your cooker, remember: timing isn’t just about pressure — it’s about how you let it out.
Mastering natural vs quick release transforms your pressure-cooked meals from good to unforgettable. Your cooker is a tool, but timing makes it a magic wand — use it wisely.