
TL;DR

Get kitchen gear delivered free with Prime
- Fast, free delivery on millions of items
- Prime Video, Amazon Music and more included
- Member-only deals all year
Regular, gentle cleaning with the right materials keeps your kitchen timers and gadgets working smoothly. Avoid harsh chemicals and follow manufacturer instructions for best results.
Identify your timer’s material before cleaning to avoid damage.
Use a soft cloth and mild soap for regular surface wipes; avoid harsh chemicals.
Remove batteries when storing timers long-term to prevent corrosion.
Deep clean only if manufacturer-approved, disassembling carefully as needed.
Stay updated on new antimicrobial and water-resistant designs to make maintenance easier.
Identify Your Timer Material to Choose the Right Cleaning Method
Kitchen timers come in plastic, metal, silicone, or a mix of materials. Knowing what yours is made of helps prevent damage. Plastic parts can crack or discolor with harsh cleaners, while metals may corrode if not dried properly. Silicone surfaces are heat-resistant but can stain or pick up residues if not cleaned regularly.
For example, a plastic digital timer might only need a damp cloth and mild soap, while a metal mechanical timer benefits from a quick wipe with a soft cloth and a dry towel afterward. Identifying your material is the first step toward effective cleaning and prolonging your gadget’s life.
As an affiliate, we earn on qualifying purchases.
How to Clean Your Kitchen Timer in 5 Easy Steps
- Unplug or remove batteries if possible — safety first. For digital timers, this prevents electrical issues.
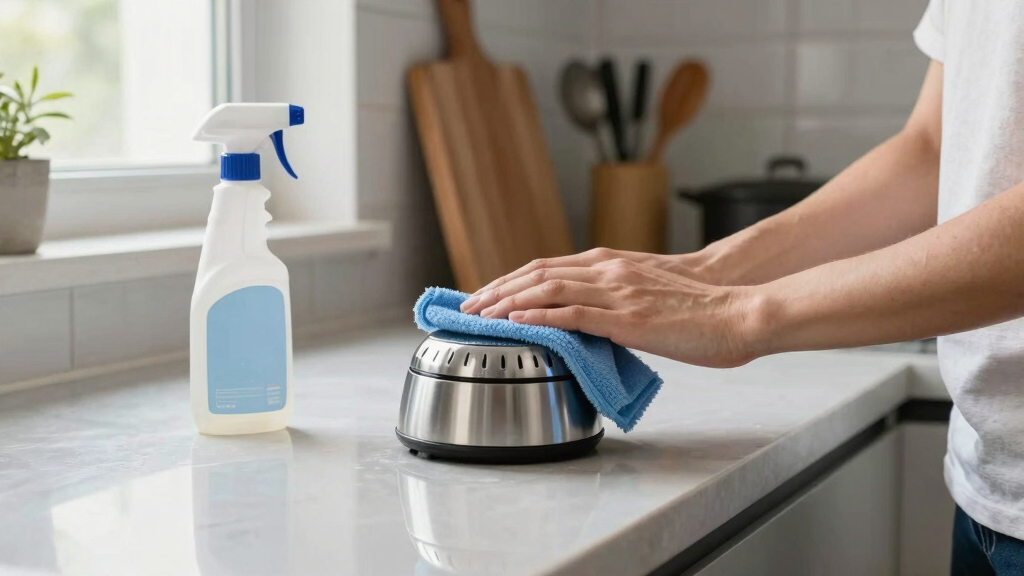
- Wipe down the exterior with a soft cloth dipped in warm water and a drop of mild dish soap.
- Use a soft-bristled toothbrush or cotton swab to gently clean crevices or buttons.
- For stubborn grime, apply a mixture of baking soda and water on a cloth, then gently scrub.
- Dry thoroughly with a clean towel before reassembling or storing.
This routine keeps dust, grease, and residue at bay. For example, after cooking, a quick wipe prevents sticky buildup that can affect the timer’s accuracy.
As an affiliate, we earn on qualifying purchases.
Comparison of Cleaning Methods for Different Timer Types
| Timer Type | Cleaning Method | Notes |
|---|---|---|
| Mechanical (metal or plastic) | Wipe with a damp cloth, dry immediately | Avoid water entering the mechanism to prevent rust or malfunction |
| Digital (electronic) | Use a damp cloth, avoid submersion | Remove batteries before cleaning to prevent short circuits |
| Smart or water-resistant | Wipe with a slightly damp cloth, minimal moisture | Check manufacturer instructions for deep cleaning options |
Matching your cleaning method to your timer type prevents damage and keeps your device functioning accurately, which is crucial for maintaining timing precision and device longevity.
antimicrobial surface kitchen timer
As an affiliate, we earn on qualifying purchases.
As an affiliate, we earn on qualifying purchases.
When and How to Disassemble Your Gadgets for a Deep Clean
Disassembly isn’t always necessary, but it allows you to remove accumulated grime in areas that surface cleaning can’t reach—like inside the dial, beneath buttons, or inside crevices. Always check the manufacturer’s instructions before taking apart your timer or gadget, as improper disassembly can damage delicate components or void warranties. If disassembly is recommended, start by removing batteries or unplugging the device to prevent electrical hazards.
Use small screwdrivers or tools suited for electronics. Carefully clean each removable part with warm, soapy water or alcohol wipes, paying attention to areas prone to dirt buildup. For example, removing the timer’s cover can reveal dirt inside the dial or buttons that a surface wipe won’t reach, and cleaning these areas can restore both appearance and functionality.
Remember: let all parts dry completely before reassembling, to prevent moisture damage or corrosion, which can cause malfunction or reduce lifespan.
Deep cleaning through disassembly can significantly improve your device’s accuracy and lifespan. Dirt and grime trapped inside can interfere with moving parts or electronic contacts, leading to inaccurate timing or malfunction. However, disassembly involves risks such as damaging delicate components or voiding warranties, so it should be done only if you are comfortable or following detailed instructions. Weigh the benefits of a thorough clean against these potential downsides, and proceed carefully to preserve your gadget’s integrity.
mechanical kitchen timer maintenance
As an affiliate, we earn on qualifying purchases.
As an affiliate, we earn on qualifying purchases.
How to Care for Electronic Components and Prevent Damage
Electronic timers and gadgets are delicate and require careful handling during cleaning. Avoid excessive moisture because internal electronic components can short circuit or corrode if exposed to water or high humidity. Use a slightly damp cloth, and never soak or submerge the device. If stubborn grime persists, a cotton swab dipped in isopropyl alcohol can be used to clean around buttons and screens without risking internal damage. This method helps remove oils, dirt, and residues that can interfere with electronic signals or cause sticky buttons.
For example, a digital timer’s screen can be wiped with an alcohol wipe to prevent smudges and ensure clarity, but care must be taken to avoid liquid seeping into internal parts. Always dry thoroughly and remove batteries if not in use for extended periods. Proper electronic care not only prevents malfunction but also extends the device’s overall lifespan, saving you money and hassle in the long run.
According to Timer Tools, this simple step of cautious cleaning and storage significantly contributes to maintaining optimal device performance over time.
When cleaning electronic components, it’s important to understand that internal parts are sensitive to static electricity, moisture, and chemical residues. Using inappropriate cleaning agents or excessive moisture can lead to corrosion, short circuits, or permanent damage. Always consult the manufacturer’s guidelines for cleaning, and prefer alcohol-based wipes or specialized electronic cleaning solutions. Proper handling and gentle cleaning techniques can prevent costly repairs or replacements, ensuring your timers remain accurate and reliable for years to come.
Smart Tips for Maintaining Your Timers and Gadgets Over Time
- Remove batteries if storing for more than a month to prevent corrosion and leakage, which can damage internal parts and reduce lifespan.
- Store gadgets in a dry, cool place away from direct sunlight to prevent warping, discoloration, or deterioration of materials like plastic and silicone.
- Regularly check for signs of wear or damage—such as cracks, sticking buttons, or fading displays—that may compromise accuracy or functionality. Early detection allows for timely repair or replacement, saving you from unexpected failures.
- Use antimicrobial cleaning wipes on plastic and silicone surfaces to reduce bacteria buildup, which is especially important if the timer is used in food preparation environments.
- Keep your gadgets away from water splashes, high humidity, or extreme temperature changes, especially if they are not water-resistant, to prevent internal damage and ensure consistent operation.
For example, wrapping timers in a soft cloth and storing them in a drawer keeps dust, moisture, and accidental damage at bay, helping preserve their accuracy and appearance for years.
Recent Tech Advances That Make Cleaning Easier
Newer timers now feature antimicrobial coatings that actively reduce bacteria and other microbes on their surfaces, making routine cleaning more effective and promoting healthier kitchen environments. Some high-end gadgets incorporate UV sterilization technology, which can be activated during cleaning cycles to actively kill germs, providing a deeper level of sanitation without extra effort.
Water-resistant designs are increasingly common, allowing you to wipe timers with a damp cloth without fear of damaging internal electronics—this simplifies maintenance and reduces the risk of internal corrosion or malfunction. Eco-friendly materials, like biodegradable plastics, are also being used, which require gentle cleaning to avoid damage and are better for the environment. These technological advancements improve ease of maintenance, extend device longevity, and help ensure your timers remain hygienic and reliable over time.
Embracing these innovations means less time spent on cleaning and more confidence in the durability and safety of your kitchen tools.
Frequently Asked Questions
How often should I clean my kitchen timers and gadgets?
Cleaning after each use or at least weekly keeps grease, dust, and food residues from building up. Regular maintenance prevents malfunctions and ensures accuracy.Can I submerge my digital timer in water?
Only if it’s explicitly water-resistant. Most digital timers are not waterproof, so use a damp cloth instead to avoid damaging electronic parts.What cleaning products are safe for electronic kitchen gadgets?
Mild soap solutions, diluted vinegar, or electronic-safe wipes work well. Avoid harsh chemicals like bleach or abrasive cleaners that can harm surfaces or internal components.How do I remove stubborn stains or grime?
Apply a paste of baking soda and water on a soft cloth, then gently scrub. For tougher spots, a small amount of rubbing alcohol on a cotton swab can do the trick.Is it necessary to disassemble my gadgets for cleaning?
Only if recommended by the manufacturer. For most, surface cleaning with a damp cloth and gentle scrubbing is sufficient and safer.Conclusion
Keeping your kitchen timers and gadgets clean isn’t just about appearance — it’s about maintaining their accuracy and extending their lifespan. Spend a few minutes after each use, and your devices will reward you with years of reliable performance. Think of it as a small investment for countless perfectly timed meals ahead.Fall Picks
fall essentials
As an affiliate, we earn on qualifying purchases.