
TL;DR

Get kitchen gear delivered free with Prime
- Fast, free delivery on millions of items
- Prime Video, Amazon Music and more included
- Member-only deals all year
Adjusting baking times depends on surface area and batter depth. Use ratios and check for doneness early. Modern tools make it easier to get consistent results when changing pan sizes.
Baking is a delicate dance of timing and temperature. Change the pan size, and suddenly, everything can go awry—underbaked, overbaked, or just plain off. But here’s the good news: with a few simple adjustments, you can make any recipe fit your pan and still turn out perfect every time.
Whether you’re swapping a 9-inch round for a 10-inch or trying to bake a sheet cake in a loaf pan, knowing how to tweak baking times keeps your kitchen stress-free. No more guesswork—just reliable, delicious results.
Baking times are influenced by surface area and batter depth, not just pan size.
Use the formula: Adjusted Time ≈ Original Time × (Original Surface Area / New Surface Area)^{0.5} for best results.
Always start checking doneness early—visual cues and toothpicks beat the clock.
Modern tools can simplify the math but don’t replace your eyes and instincts.
Adjust oven temperature slightly when changing pan material or color for even better results.
Baking Times by Pan Size: Adjusting Recipes Without Guesswork
Change the pan and you change the bake. The reliable adjustment comes from surface area, batter depth, pan material, and early doneness checks, not from simply doubling or halving the clock.
Estimate time with original time multiplied by the square root of the surface-area ratio.
Start checking before the estimate. Visual cues and a clean tester beat the timer.
Baking times do not scale linearly. More exposed surface area usually means faster heat penetration, while deeper batter slows the center down.
Square inches of surface area.
About 23% more exposed surface.
Minutes when moving from 9-inch to 10-inch round.
Often helpful for thinner or darker pans.
The pan is a heat-transfer decision.
Pan size affects how much batter is exposed to heat and how far heat must travel to reach the center. Wider and shallower bakes usually finish sooner; deeper layers usually need more patience.
More exposure, faster set.
A larger surface area gives heat more access to the batter, so edges and center set sooner when batter depth does not increase.
Deeper layers slow the middle.
A loaf pan or smaller pan may make the batter thicker, creating a longer path for heat to reach the center.
Color and material matter.
Dark metal absorbs heat quickly, glass holds heat differently, and light metal usually browns more gently.
Use this as a starting point, then verify with doneness cues because ovens, altitude, batter density, and pan material all shift the result.
30 × (63.6 / 78.5)0.5 ≈ 27 minutes for a 9-inch round recipe moved to a 10-inch round pan.
Common pan swaps and timing signals.
These are practical starting points. The clock gets you close; color, spring, internal texture, and a tester get you across the finish line.
| Original Pan | New Pan | Surface Change | Approx. Timing | Reliability Cue |
|---|---|---|---|---|
| 9-inch round | 10-inch round | ~ Wider, shallower | Reduce about 10% | ✓ Check at 24-25 min on a 30 min recipe |
| 8-inch square | 9-inch square | ~ More exposed area | Reduce about 15% | ✓ Edges set and center springs back |
| 9-inch round | 9 x 13-inch rectangle | ✓ Much shallower layer | Reduce about 20% | ✓ Watch browning closely |
| Sheet pan | Loaf pan | ✗ Deeper center | Increase and lower temp if needed | ~ Internal temperature is useful |
A no-guesswork workflow for any pan.
Use math to make the first adjustment, then let the bake tell you what it needs. This keeps the process precise without pretending every oven behaves the same.
Start with the recipe.
Record the original pan, temperature, batter amount, and stated baking time.
Compare surface area.
Calculate or look up both pan areas before adjusting the clock.
Check batter depth.
Shallower bakes finish faster; deeper bakes need more time.
Adjust the estimate.
Apply the square-root ratio, then begin checking early.
Confirm doneness.
Use golden edges, spring, a clean tester, or internal temperature.
How different changes push the bake.
Think in directional pressure: more surface area pulls time down, more depth pushes time up, and darker pans may require temperature control.
Timing is a guide. Golden edges, a set center, spring-back, a clean toothpick, or a 200°F internal reading often provide better confidence.
Start checking 5-10 minutes early.
This prevents a correct estimate from becoming an overbaked cake.
Lower heat for aggressive pans.
Dark, thin, or fast-browning pans often benefit from a 25°F reduction.
Use tools, then use your senses.
Calculators and apps simplify area math, but they cannot see your oven’s hot spots.
Take notes for repeat success.
Record pan, time, temperature, and result so your next swap starts smarter.
From pan choice to perfect crumb.
Each choice changes the next signal. Follow the chain and you will know where to adjust before the bake goes off track.
Volume and density set the baseline.
More area usually shortens time.
Thicker layers slow heat transfer.
Material and color affect browning.
The estimate gets you close.
Cues confirm the final result.
Fast answers for real kitchen swaps.
When in doubt, calculate once, check early, and trust doneness signs over rigid timing.
Can I just halve or double baking time?
No. Baking times do not scale linearly because surface area, depth, pan material, and batter density all interact.
How much should I adjust the time?
Compare pan surface areas, apply the square-root ratio, then start checking several minutes before the estimate.
Should oven temperature change too?
Sometimes. Lower by about 25°F when a darker, thinner, or faster-browning pan risks drying the edges before the center sets.
What is the best doneness test?
Use golden edges, a firm or springy center, a clean toothpick, or internal temperature near 200°F for many cakes and quick breads.
Why Pan Size Changes Baking Time (And How It Works)
When you switch pans, the key factors are surface area and batter depth. Larger surface area means heat reaches the batter faster, cutting baking time. Thicker or deeper batter slows heat transfer, needing more time. This is because heat transfer in baking is influenced by how much surface is exposed and how deep the heat must penetrate. If the surface area increases but the depth remains the same, the heat can reach the batter more quickly, reducing baking time. Conversely, increasing batter depth creates a thermal barrier, requiring longer baking to ensure the center is cooked through. Understanding this tradeoff helps you predict how your baking time will change when you modify pan size or shape. For example, a thin sheet cake will bake faster than a dense loaf because of differences in both surface area exposure and batter depth, which directly impact heat transfer efficiency and baking duration.
For example, a 9-inch round pan has about 63.6 square inches of surface area, while a 10-inch pan has roughly 78.5 square inches. That difference impacts how quickly the heat penetrates the batter, but it’s also important to consider the batter’s depth. A shallow sheet pan with the same batter volume as a deep loaf pan will bake faster because the heat has less distance to travel to the center.
baking pan size conversion calculator
As an affiliate, we earn on qualifying purchases.
As an affiliate, we earn on qualifying purchases.
How to Calculate the Right Baking Time for Any Pan
Start with the original recipe’s baking time. Then, compare the surface areas of your original and new pans. Use this simple formula:
Adjusted Time ≈ Original Time × (Original Surface Area / New Surface Area)^{0.5}
This formula accounts for the fact that heat transfer efficiency increases with larger surface area but also considers the depth of the batter. The square root exponent reflects how heat conduction scales with surface area relative to volume. A larger surface area generally means faster baking, but if the batter is significantly deeper, it can offset this advantage. Therefore, this formula provides a balanced estimate by considering both factors. By applying it, you get a more accurate prediction of how long your baked good needs in the oven, reducing trial-and-error and preventing overbaking or underbaking. Remember that this is an approximation—always look for visual cues and test for doneness to fine-tune your timing.
For example, if a cake baked in a 9-inch round (about 63.6 sq in) takes 30 minutes, and you switch to a 10-inch (78.5 sq in), the calculation looks like this:
- Adjusted Time ≈ 30 × (63.6 / 78.5)^{0.5} ≈ 30 × (0.81)^{0.5} ≈ 30 × 0.9 ≈ 27 minutes
This estimate helps you anticipate the new baking duration, but always verify doneness early, as oven calibration and batter composition can influence actual baking times.
As an affiliate, we earn on qualifying purchases.
Comparison Table: How Different Pan Changes Affect Baking Time
| Original Pan | New Pan | Approximate Adjustment |
|---|---|---|
| 9-inch round | 10-inch round | Reduce baking time by about 10% |
| 8-inch square | 9-inch square | Reduce baking time by about 15% |
| 9-inch round | 9×13-inch rectangle | Reduce baking time by about 20% |
These are rough guidelines—use visual cues and don’t rely solely on the clock.
As an affiliate, we earn on qualifying purchases.
Tips to Perfectly Adjust Baking Time Every Time
- Start checking doneness 5-10 minutes earlier than the calculated time.
- Use a toothpick or cake tester—insert in the center, and if it comes out clean, it’s done.
- Adjust oven temperature slightly—lower by 25°F if your pan is darker or thinner.
- Remember, batter thickness matters. Thicker layers mean longer baking regardless of pan size.
- Take notes on your adjustments—every oven and recipe is a little different.
As an affiliate, we earn on qualifying purchases.
Modern Tools and Tips for Accurate Adjustments
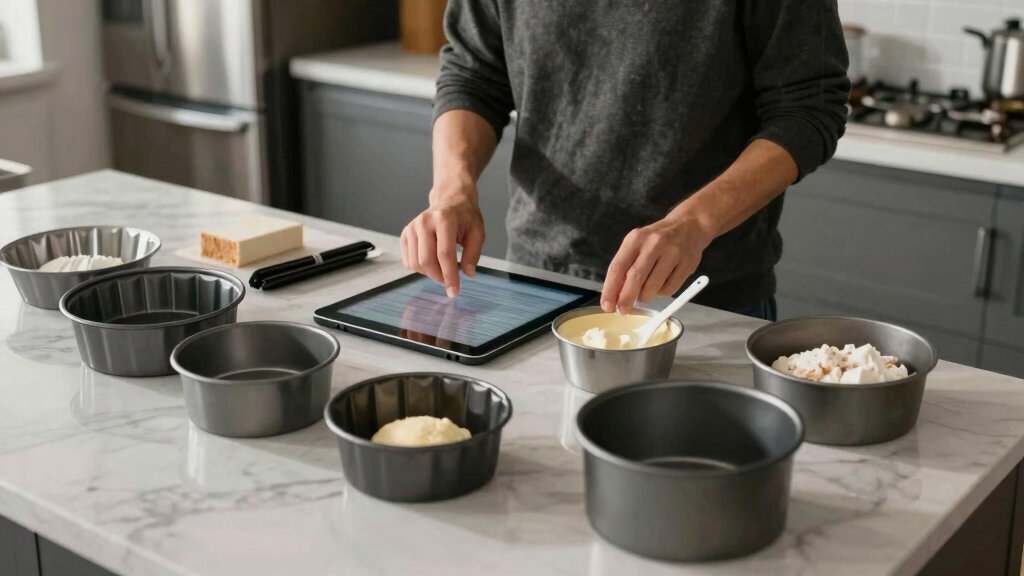
Today, you don’t have to guess. Online calculators and smartphone apps can do the math for you, comparing surface areas and suggesting precise times. Some popular tools include baking-specific apps that factor in oven calibration, altitude, and pan material.
Using these digital tools not only simplifies calculations but also reduces the risk of human error. They can help you account for variations like oven hot spots or differences in pan material, which can significantly impact baking times. By relying on these tools, you gain more confidence in your adjustments, leading to more consistent results and less frustration, especially when experimenting with new recipes or pan sizes. The tradeoff is that while these tools are highly accurate, they still require you to observe your baked goods closely and not rely solely on the calculator’s suggestion. Combining technology with your senses and experience yields the best results.
Be Flexible and Watch for Signs of Doneness
Even with calculations, every oven is different. Factors like hot spots and altitude can throw off timings. Always start checking a few minutes early. Look for golden edges, a firm center, and use a toothpick—if it comes out clean, it’s ready. Over-reliance on timing alone can lead to overbaking or underbaking, especially if you’re unfamiliar with your oven’s quirks. Internal temperature is a reliable indicator—many baked goods are done around 200°F, which ensures doneness without overcooking. Developing an eye for visual cues and understanding how your oven behaves are key to consistently perfect results. Think of baking as a dance—your senses, combined with a little flexibility, lead to the best outcomes every time. Adjustments may be necessary based on how your baked goods look and feel, not just on the clock or calculator.
Remember, practice makes perfect. The more you observe and adapt, the better your baking intuition becomes, leading to more dependable and delicious results.
Frequently Asked Questions
How do I know how much to adjust baking time when changing pan size?
Compare the surface areas of your original and new pans. Use the ratio in the formula provided and start checking doneness a few minutes early. Visual cues are your best friend—look for golden edges and a clean toothpick.
Can I just halve or double the baking time?
No. Baking times don’t scale linearly. Smaller pans can bake faster, but the exact time depends on factors like batter depth and material. Always rely on visual cues and testing for doneness.
Should I adjust oven temperature when switching pans?
Sometimes. If the new pan is darker or thinner, lowering the temperature by 25°F can prevent overbaking. Use your senses and check early. It’s about fine-tuning, not just timing.
What’s the best way to tell if my baked good is done?
Use a toothpick or cake tester—insert in the center. If it comes out clean, it’s ready. Look for golden edges and a firm center. Internal temperature around 200°F also indicates doneness for many baked goods.
Are there tools to help me adjust baking times accurately?
Yes, online calculators and baking apps can compare pan surface areas and suggest precise adjustments. They save time and reduce guesswork, especially when trying new pan sizes or recipes.
Conclusion
Changing pan sizes doesn’t have to mean unpredictable results. With a little math, keen observation, and modern tools, you can make any recipe fit your pan and still come out perfect. Keep experimenting, stay attentive, and your baked goods will always impress.
So next time you swap a pan, remember: a smarter approach makes baking easier—and more delicious.
Fall Picks
fall essentials
As an affiliate, we earn on qualifying purchases.