TL;DR
Open a free Amazon Business account
Business pricing, bulk buying and tax-exempt orders.
Create a free accountAs an affiliate, we earn on qualifying purchases.
Your choice of timer placement—magnet, stand, clip, or lanyard—affects how easily you see and use your timer. Proper placement can make cooking smoother and more stress-free, especially with versatile options and recent smart innovations.
Kitchen timers are more than just ticking devices—they’re your silent sous-chefs, keeping you on track. But where you place your timer matters just as much as setting it. A misplaced timer is easy to overlook, while the right placement keeps it front and center. Whether you prefer it on the fridge, countertop, or clipped onto your apron, the method you choose influences how smoothly your cooking flows. This guide breaks down the four main options—magnet, stand, clip, or lanyard—and gives you practical advice for each.
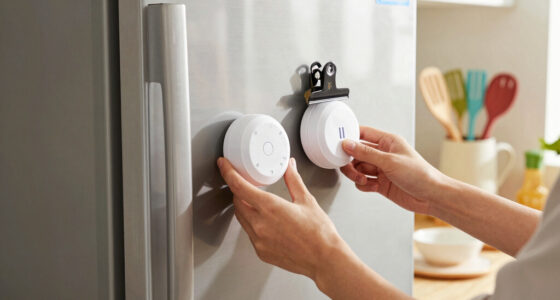
Magnetic timers are easiest for quick glances on metal surfaces like the fridge or oven door.
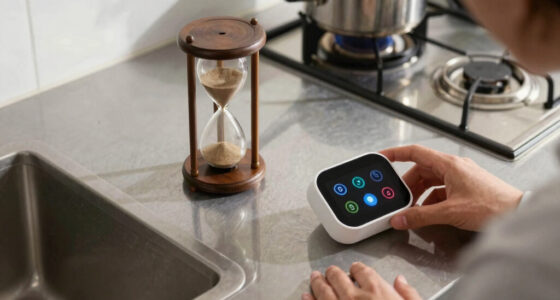
Stands provide a clear, adjustable display but take up counter space.
Clips keep your timer close during active tasks but need sturdy handles or fabrics.
Lanyards are best for outdoor or mobile use, offering portability over stability.
Choose your placement based on your kitchen layout, cooking habits, and the surfaces available.
Magnet Placement: Quick, Secure, and Always in Sight
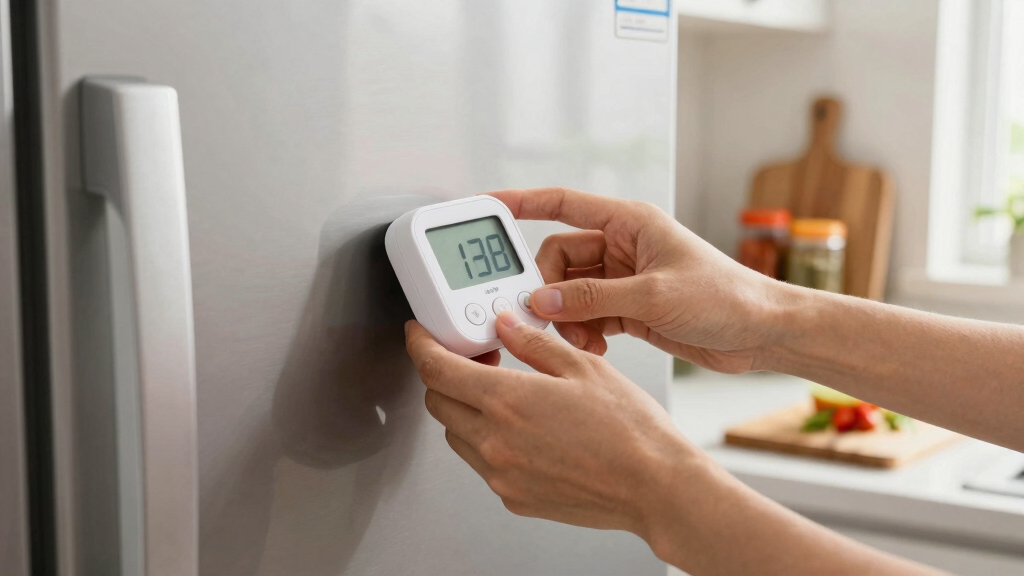
Magnet placement is the most popular choice for many home cooks because it’s quick and hassle-free. A strong magnet on your timer sticks right to your fridge or oven door—places you look at constantly. Imagine grabbing a hot dish from the stove, glancing at the fridge, and seeing your timer blinking away. The key is a sturdy magnet—cheap ones can slip or fall if your surface is smooth or vertical.
For example, a timer with a powerful neodymium magnet stays put even if you bump the fridge door. This setup is perfect if your kitchen has a metal surface and you want your timer in your line of sight without cluttering your counters.
**Practical Takeaway:** Test the magnet strength before relying on it. If your magnet slips, consider upgrading to a stronger one or attaching a magnetic strip to improve grip. Keep your timer on a visible metal surface you frequently check, like the fridge or oven, to maximize efficiency.
**Why It Matters:** Magnet placement matters because it directly impacts how reliably and conveniently you can monitor your timer. A weak magnet might cause the timer to fall, leading to missed alarms or overcooked food. Conversely, a strong magnet keeps the timer secure and accessible, reducing the risk of misplacement during busy cooking sessions. The tradeoff is that magnets only work on ferromagnetic surfaces, so if your kitchen features non-magnetic materials, you’ll need alternative options.

Kitchen Timers for Cooking, Chef Cooking Timer Clock with Loud Alarm – 100% Mechanical Desk Timer – No Batteries Required – Magnetic Backing, Exquisite Stainless Steel Body – Countdown Reminder
- Material: Premium 304 stainless steel construction
- Design: Saucer-shaped with sleek aesthetic
- Magnetic Back: Adheres to metal surfaces easily
As an affiliate, we earn on qualifying purchases.
As an affiliate, we earn on qualifying purchases.
Stand or Base: Keep It Standing, Keep It Easy to Read
Using a stand or base turns your timer into a mini sculpture on your countertop. It’s ideal if you want a large, stable display that’s easy to see from anywhere in the kitchen. Think of a sleek, adjustable stand that tilts your timer for perfect viewing. The downside? It takes up space. If your counters are crowded with gadgets, a bulky stand might feel like an obstacle.
For instance, during busy mornings, I place my timer on the stand right next to my coffee maker. It’s easy to glance at while stirring oatmeal or chopping vegetables. To make this practical, choose a stand with adjustable angles and a non-slip base, so your timer stays put even during vigorous stirring or chopping.
**Action Step:** Measure your countertop space and select a stand that fits comfortably without cluttering your workspace. Position it in a spot you naturally look at during your routine tasks to ensure you don’t forget your timer.
**Why It Matters:** A stand provides a dedicated, stable platform that keeps your timer visible and upright, reducing the chance of misplacement. The tradeoff is the space it occupies, which can be a concern in smaller kitchens. The benefit is a clear, unobstructed view that helps prevent overcooking or forgetting your timing altogether. Choosing an adjustable stand adds versatility, allowing you to optimize visibility based on your height and task.

Digital Kitchen Timer, Big Display Screen, Loud Alarm, Strong Magnetic Backing Stand, Cooking Baking Kids Classroom Teacher Game Timers, Minute Seconds Count Up Countdown and Simple Operation(4 Pack)
- Multiple Timing Functions: Count up and down from 1s to 99min
- Versatile Usage: Suitable for cooking, studying, exercising
- Magnetic Backing: Strong magnet for refrigerator placement
As an affiliate, we earn on qualifying purchases.
As an affiliate, we earn on qualifying purchases.
Clip or Hook: Hands-Free Convenience for Busy Cooks
Clips attach your timer to apron strings, oven handles, or utensil racks—keeping it within arm’s reach without cluttering surfaces. If you’re flipping pancakes or kneading dough, a clip keeps the timer close and out of the way. But not all clips are equal—some slip off or aren’t strong enough to grip thicker fabrics or sturdy handles.
Picture clipping your timer onto your apron while baking bread. Every time you check the oven, you see the countdown. Practical Tip: Look for clips with rubber grips or spring-loaded mechanisms to prevent slipping. Test the clip on your fabric or handle before starting your cooking to ensure it stays secure.
**Decision Framework:** Choose clips with non-slip features for active tasks. Position the clip at a comfortable height to see the timer without bending or stretching, and avoid clips that are too tight or too loose.
**Why It Matters:** Clips offer hands-free convenience, which is essential during active cooking or baking when your hands are full. They help keep your timer accessible and prevent it from getting lost in clutter. The tradeoff is that clips can slip or fall if not properly secured, especially during vigorous movements. Selecting a high-quality clip with rubber grips minimizes this risk and ensures your timer remains reliable during busy moments.

Timer, Kitchen Timers for Cooking Classroom Timer for Kids Teachers Magnetic Digital Timers 2 Pack, Black
- Flashing Light Mode: Adjustable alarm and silent modes
- Versatile Mounting Options: Magnet, hanging hole, or clip
- Wide Compatibility: Suitable for kitchen, office, and study
As an affiliate, we earn on qualifying purchases.
As an affiliate, we earn on qualifying purchases.
Lanyard or Wrist Strap: Portable, Perfect for Multitasking
Lanyards or wrist straps turn your timer into a portable gadget. Wear it around your neck or wrist, and it’s always handy—great for outdoor grilling or when you’re moving between rooms. This option is less common for static kitchen use but shines in more active scenarios.
Imagine grilling steaks outside while keeping your timer around your neck, so you don’t have to run back to the kitchen. Practical Application: Use this when your cooking involves moving around a lot, like outdoor barbecues or multi-room baking sessions. Keep in mind, it’s less stable when placed on surfaces, so reserve this for portability rather than stationary placement.
**Actionable Advice:** Use a lanyard or wrist strap only if you need mobility. For static cooking, prefer magnetic or stand options to ensure your timer stays put and is easy to read.
**Why It Matters:** The portability of lanyards and wrist straps is their main advantage—they allow you to keep track of your timer without being tied down to one spot. This flexibility is especially useful in outdoor or multi-room cooking scenarios. The tradeoff is that they are less stable when placed on surfaces, increasing the risk of dropping or losing the timer if you forget to wear it. Therefore, this method is best suited for active, mobile cooking environments rather than fixed countertop use.

Polder 898-95 Clock Timer and Stopwatch Black
- Multi-function clock, timer, stopwatch: Large digital display for easy reading
- Keypad lock feature: Prevents setting interruptions during use
- 12/24-hour clock and timers: Includes 10-hour count-down and count-up
As an affiliate, we earn on qualifying purchases.
As an affiliate, we earn on qualifying purchases.
Recent Trends: Smarter, Safer, More Versatile
Smart timers now come with app connectivity, voice controls, and remote alerts. Many feature magnetic backs, stands, or clips—offering flexible placement. For example, a recent model combines a strong magnet with a fold-out stand and a clip, giving you three ways to place it.
Eco-conscious designs are also gaining ground, with timers made from recyclable plastics or sustainable materials. Plus, larger, backlit displays make reading the timer easier from any angle or lighting condition. Practical Takeaway: When choosing a smart timer, prioritize models with multiple placement options to adapt to your changing needs and kitchen setup.
**Why It Matters:** The latest trends in timers reflect a desire for adaptability and safety. Smart timers with multiple placement options allow you to switch between magnet, stand, or clip modes depending on your task, increasing convenience. Eco-friendly materials reduce environmental impact, aligning with sustainable living. Larger displays and backlighting improve visibility, especially in dim lighting. These advancements mean your timer can seamlessly integrate into your cooking routine, enhancing both safety and efficiency.
What You Should Know Before Picking a Method
Not all surfaces are magnet-friendly. Steel or iron surfaces hold magnets well, but aluminum or plastic won’t. Clips need sturdy handles or fabric to grip, and stands require counter space. To make an informed decision, assess your kitchen surfaces and your typical cooking routines.
Practical Decision-Making Tip: For small, cluttered kitchens, opt for a magnetic timer on the fridge. If your hands are often full, a clip or lanyard might be more practical. Match your placement choice to your routine to ensure you see your timer when you need it most.
**Why It Matters:** Understanding your surfaces and routines helps you choose a placement method that minimizes hassle and maximizes visibility. For instance, relying solely on a magnet in a kitchen with non-magnetic surfaces can lead to frustration and missed cues. Similarly, choosing a clip without sturdy handles or fabrics can result in frequent slips. Knowing the tradeoffs allows you to prioritize reliability and convenience, ensuring your timer becomes a seamless part of your cooking process.
Which Placement Fits Your Cooking Style?
Choosing the right placement depends on your habits. Do you prefer to see your timer at a glance? A magnet on the fridge or oven door works best. Want it close but out of the way? A stand on the counter is ideal. Need to keep your hands free? Clips or lanyards are your friends.
For instance, if you often bake bread while preparing other dishes, a stand near your mixer gives a clear view. If you’re grilling outside, a lanyard keeps your timer handy without cluttering your grill station.
Practical Tip: Reflect on your most common cooking tasks and choose a placement that minimizes reaching or bending, ensuring you can glance at your timer effortlessly during busy moments.
**Why It Matters:** Matching your timer placement to your cooking style ensures efficiency and reduces stress. For example, a magnet on the fridge is great for quick checks, but if you need to see the timer while kneading dough, a stand or clip might be better suited. The key is to align the placement with your routines so that your timer is always within easy reach and sight, preventing overcooking or forgotten timers.
Comparison Table: Magnet, Stand, Clip, or Lanyard?
| Feature | Magnet | Stand | Clip | Lanyard |
|---|---|---|---|---|
| Ease of use | Quick stick, instant access | Stable, adjustable viewing | Hands-free, at arm’s reach | Portable, wearable |
| Space requirement | Minimal; on fridge/metal surfaces | Counter space needed | Clips onto fabric or handles | Worn around neck or wrist |
| Best for | Frequent, quick glances | Long cooking sessions | Active tasks, multitasking | Outdoor or multi-room use |
| Limitations | Surface dependent | Counter clutter | Slipping or slipping off | Less stable on surfaces |
Frequently Asked Questions
Can I use a magnet on any surface?
No, magnets stick best to ferromagnetic surfaces like steel or iron. Aluminum, plastic, or stainless steel without magnetic properties won’t hold magnets securely.
What if my timer keeps slipping off the fridge?
Try a timer with a stronger magnet or add an adhesive magnetic strip for extra grip. Ensuring the surface is clean and free of dust also helps magnets stay put.
Are clip-on timers reliable during vigorous cooking?
They can be, if you choose clips with rubber grips or spring mechanisms. Always test the clip before using it during busy tasks to avoid surprises.
Should I get a smart timer with multiple placement options?
Yes, especially if you want flexibility. Many smart timers feature magnets, stands, and clips, letting you switch depending on your activity or mood.
How do I prevent my timer from falling or being misplaced?
Pick a placement method that matches your surfaces and routine—magnet for metal surfaces, clip for fabric or handles, stand for countertop. Combining options works best for versatile needs.
Conclusion
The best timer placement is the one that seamlessly fits your cooking style and kitchen space. Whether it’s a magnetic stick, a sturdy stand, a handy clip, or a portable lanyard, the goal is to keep your timer visible, accessible, and secure. A simple shift in placement can make your cooking smoother and more enjoyable.
Next time you set a timer, think about where it lives during your cooking—because the right spot makes all the difference.
Grilling season Picks
grills
As an affiliate, we earn on qualifying purchases.