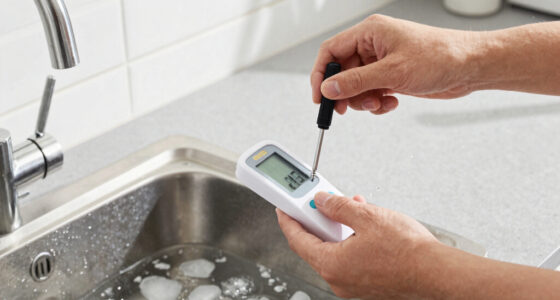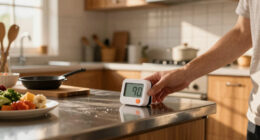
This guide will help you understand how to use a digital kitchen timer to track cooking or baking times accurately. It is suitable for beginners and those unfamiliar with digital timers. By following these steps, you will be able to set the timer correctly and know when your food is ready.

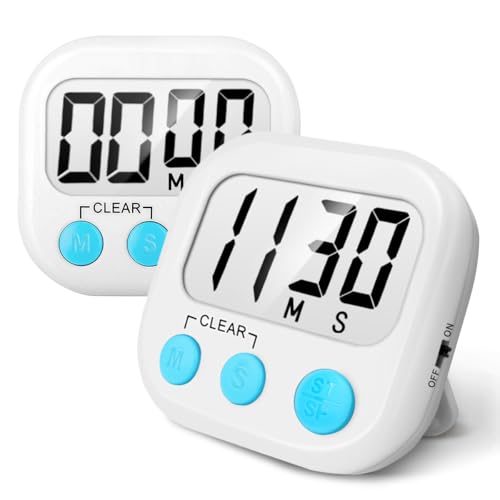
Antonki 2 Pack Digital Timer for Kids, Magnetic Countdown Kitchen Timers for Cooking, Classroom, Exercise, Oven
- ✔ Maximum Count: 99 minutes 59 seconds
- ✔ Power: 2 x AAA Batteries included
- ✔ Modes: Loud/Silent
Antonki 2 Pack Digital Timer for Kids and Cooking
- ✔ Count Up & Countdown: Yes
- ✔ Maximum Count: 99 minutes 59 seconds
- ✔ Modes: Loud/Silent

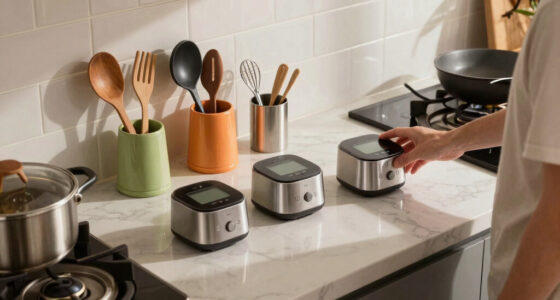
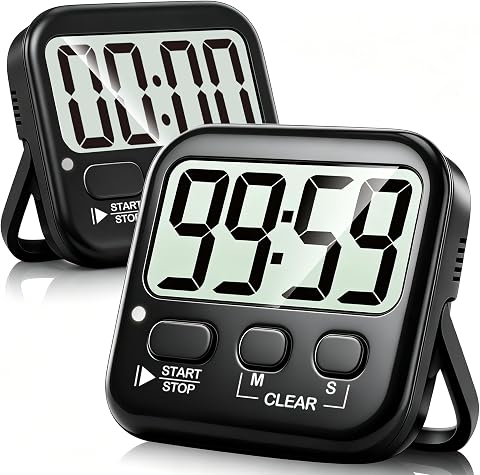
2 Pack Digital Kitchen Timer with Loud Alarm and Magnetic Backing
- ✔ Quantity: 2 pack
- ✔ Display: Large digital
- ✔ Alarm: Loud buzzer
Difficulty: Beginner | Time: 10-15 minutes
What You’ll Need
Tools & Materials:
- Digital kitchen timer
Knowledge:
- Basic understanding of digital button operation

Antonki 2 Pack Digital Timer for Kids, Magnetic Countdown Kitchen Timers for Cooking, Egg, Classroom, Teacher, Exercise, Study, Oven - Battery Included
Count up & Countdown timer. You must want a reliable timer to know when to start or stop...
As an affiliate, we earn on qualifying purchases.
Antonki 2 Pack Digital Timer for Kids, Magnetic Countdown Kitchen Timers for Cooking, Classroom, Exercise, Oven
This option stands out for its large, easy-to-read display and multiple mounting options, including magnets, kickstands, and hanging holes. Its countdown and count-up functions make it versatile for cooking, exercise, and classroom activities. Compared with similar options, it offers a balanced combination of features and portability but is limited to a maximum of 99 minutes 59 seconds and relies on AAA batteries, which are not rechargeable. Its basic feature set may not satisfy those needing more advanced timing options, but it remains an excellent all-round pick for most everyday uses.
Pros:
- Large, easy-to-read display
- Multiple mounting options (magnet, kickstand, hanging hole)
- Includes batteries for immediate use
- Loud and silent alarm modes
Cons:
- Limited to 99 minutes 59 seconds maximum
- Requires AAA batteries (not rechargeable)
- Basic features may not suit advanced timing needs
Best for: users seeking a versatile, easy-to-read timer for multiple environments
Not ideal for: those needing longer timing capabilities or rechargeable batteries
Bottom line: A well-rounded, versatile timer ideal for general kitchen, classroom, and exercise use—with excellent readability and mounting options.
“A well-rounded, versatile timer ideal for general kitchen, classroom, and exercise use—with excellent readability and mounting options.”

Antonki 2 Pack Digital Timer for Kids, Magnetic Countdown Kitchen Timers for Cooking, Egg, Classroom, Teacher, Exercise, Study, Oven - Battery Included
Count up & Countdown timer. You must want a reliable timer to know when to start or stop...
As an affiliate, we earn on qualifying purchases.
Antonki 2 Pack Digital Timer for Kids and Cooking
This set offers large, easy-to-read displays with simple, responsive buttons, making it perfect for those who want straightforward operation. Its built-in memory allows quick resets, which is convenient during repetitive tasks like cooking or studying. While it matches the maximum timing of 99 minutes 59 seconds, some users may find the buttons less responsive or prefer a timer with more advanced features. Its versatility with magnet, kickstand, and hanging hole makes it adaptable for various environments, but it shares the same battery requirement and limited timing range as the others.
Pros:
- Large, easy-to-read display
- Built-in memory for quick resets
- Multiple mounting options (magnet, kickstand, hanging hole)
- Batteries included
Cons:
- Limited to 99 minutes 59 seconds
- Some users report less responsive buttons
- Requires AAA batteries (not rechargeable)
Best for: people who prefer simple, quick setup timers with memory functions
Not ideal for: users needing longer timers or rechargeable options
Bottom line: A straightforward, reliable timer with memory features, suitable for casual cooking, studying, and classroom activities.
“A straightforward, reliable timer with memory features, suitable for casual cooking, studying, and classroom activities.”
2 Pack Digital Kitchen Timer for Cooking Big Digits Loud Alarm Magnetic Backing Stand Cooking Timers for Baking White
Kitchen Timers with big buttons, large digital display, loud buzzer and clean bright look(Battery Not Included)
As an affiliate, we earn on qualifying purchases.
2 Pack Digital Kitchen Timer with Loud Alarm and Magnetic Backing
This set is ideal for environments where a loud alarm is essential, such as noisy kitchens or for users with hearing difficulties. It features large buttons, a bright digital display, and a loud buzzer that guarantees notification. Its magnetic backing, hook, and retractable stand provide flexible placement options. The maximum timing of 99 minutes and 59 seconds is standard, but the lack of included batteries may be inconvenient for some users. Its simple interface makes it less suitable for those seeking advanced features but perfect for straightforward timing needs.
Pros:
- Large digital display for easy reading
- Very loud buzzer for clear alerts
- Magnetic backing, hook, and stand for versatile placement
- Remembers last setting
Cons:
- Battery not included, requiring separate purchase
- Limited to just under 100 minutes
- No advanced features or digital customization
Best for: users in noisy environments or those who want a no-fuss timer
Not ideal for: people needing longer timers or rechargeable batteries
Bottom line: A simple, loud timer perfect for noisy environments or those who want a straightforward, reliable alert system.
“A simple, loud timer perfect for noisy environments or those who want a straightforward, reliable alert system.”
As an Amazon Associate we earn from qualifying purchases.
Before You Start
Make sure the timer is placed within easy reach in your cooking area. Clear the timer display for easy reading. Confirm that it is turned on and reset to zero if needed.
Step-by-Step Instructions
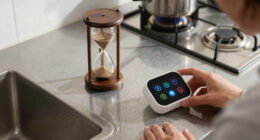
Step 1: Power on the timer
Press the ‘On’ or ‘Start’ button to turn on the timer. Some timers turn on automatically when you press any button. Confirm that the display lights up or shows a zero.
Tip: Check the manual if your timer has a dedicated power button or if it turns on automatically.
Check: The display shows ’00:00′ or a similar zeroed-out time.
Step 2: Select the desired countdown mode
Ensure the timer is set to countdown mode, usually indicated by a ‘Count Down’ label or icon. If your timer has multiple modes, press the mode button until ‘Count Down’ appears on the display.
Tip: Some timers default to count-up mode; verify mode before setting the time.
Check: Display indicates countdown mode, ready for time input.
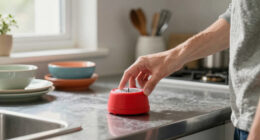
Step 3: Input the cooking time
Use the number keypad or buttons to enter the desired time in minutes and seconds. For example, press ‘1’, ‘5’, ‘0’ to set 15 minutes, or ‘3’, ‘0’, ‘0’ for 3 minutes. Confirm each input if required by pressing an ‘Enter’ or ‘Set’ button.
Tip: Be careful to input the correct sequence; some timers may have a ‘clear’ or ‘reset’ button to start over if you make a mistake.
Check: The display shows the set time, counting down once the timer starts.
Step 4: Start the countdown
Press the ‘Start’ or ‘Begin’ button to activate the countdown. The timer should begin decreasing from the set time immediately.
Tip: Listen for a beep or visual cue indicating the timer has started if your timer provides feedback.
Check: The display decreases in real-time until it reaches zero.
Step 5: Monitor the timer during operation
Keep an eye on the display to ensure the timer is running correctly. Avoid pressing other buttons unless necessary, which might pause or reset the timer.
Tip: Some timers have a pause feature; use it carefully if needed to temporarily halt timing.
Check: The timer counts down smoothly without interruptions or errors.
Step 6: Hear the alarm when time expires
When the countdown reaches zero, the timer will sound an alarm or beep. Confirm that the alarm sounds clearly and that the display shows ’00:00′ or a similar indicator.
Tip: Many timers allow you to turn off the alarm by pressing a button; do so if necessary to silence it.
Check: Alarm sounds loudly enough to be heard and the display shows that time has finished.
Common Mistakes to Avoid
- Entering incorrect time or pressing wrong digits. — Double-check the number input before starting the timer; use the clear button if available to reset.
- Forgetting to start the timer after setting it. — Always press the start button immediately after inputting the desired time.
- Not verifying the mode (countdown vs count-up). — Ensure the timer is in countdown mode before entering the time.
- Misplacing the timer or covering the speaker. — Place the timer in a visible, accessible spot where the alarm can be heard clearly.
Troubleshooting
Problem: Timer does not turn on or display remains blank.
Solution: Check batteries or power connection; replace batteries or ensure power source is active.
Problem: Timer does not start countdown after pressing start.
Solution: Verify mode is set to countdown; re-enter the time and press start again.
Problem: Alarm does not sound at the end.
Solution: Check the volume setting or mute option; ensure the alarm is enabled and the speaker is unobstructed.
Problem: Display shows incorrect or scrambled numbers.
Solution: Reset the timer; turn it off and on again, or remove and reinsert batteries if applicable.
What Success Looks Like
The timer counts down smoothly from your set time to zero, then emits a clear, loud alarm. The display shows ’00:00′ or a similar indicator, and you can turn off the alarm easily. This confirms the timer is functioning correctly and ready for future use.
Next Steps
Reset the timer if you need to reuse it. Store it in a convenient location. Consider testing with different times to become fully comfortable with operation. Refer to the manual for additional features like snooze or stop options. Replace batteries periodically to maintain functionality.
Frequently Asked Questions
How do I change the time on a digital kitchen timer?
Enter the new desired time using the keypad or buttons, then press start to activate the countdown. If the timer has a dedicated reset or clear button, press it first to clear the previous setting.
Can I use a digital timer for multiple tasks?
Yes, reset the timer after each use and set a new time for other tasks. Many timers can be used repeatedly without issues.
What should I do if the timer’s alarm is too quiet?
Check if the timer has a volume control setting; increase it if available. Place the timer closer or in a more audible location during use.
Is it safe to leave the timer on during cooking?
Yes, as long as it is placed in a safe, dry location away from direct heat or water. Turn it off or reset after use to conserve battery life.