TL;DR
Properly setting an analog dial timer is straightforward if you align the current time with the dial and turn it slowly. Most timers are accurate within a few minutes when set correctly, making them a simple yet dependable choice for home use.
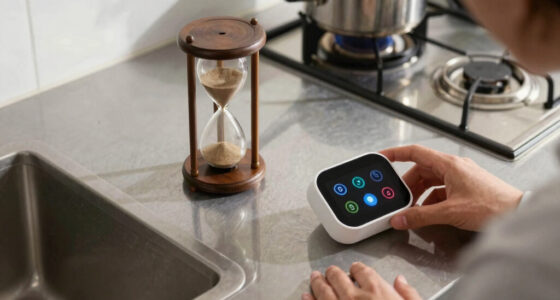
Picture this: you’re baking bread, and your old analog timer slips out of your mind, only to alert you at the perfect moment — or a little late. Analog dial timers are simple, reliable tools that have been helping home cooks and gardeners manage time for decades. But despite their straightforward design, many users struggle with setting them exactly right.
If you want your timer to be spot-on every time, understanding how to set it accurately is key. This guide will walk you through the tricks, recent innovations, and common pitfalls — so your timing is always just right.
Always verify the current time before setting your timer to ensure accuracy.
Turn the dial slowly and confirm it clicks into place — don’t force it.
Align the "Now" marker on your timer with the actual time for precise scheduling.
Regularly clean and inspect the gear mechanisms to prevent wear and maintain accuracy.
Choose between mechanical and electromechanical timers based on your durability needs and usage frequency.
Why Properly Setting Your Analog Timer Matters
It might seem obvious, but a tiny misalignment can throw off your entire schedule. Set your timer incorrectly, and your oven might shut off before your bread is baked, or your garden watering could turn off early. Precision isn’t about perfection but about making sure your device matches real time accurately.
Imagine turning the dial to 7:00 AM, only to find out you actually set it for 7:30. That half-hour difference can mean the difference between a perfectly cooked meal and a burnt one. Proper setting makes your timer a dependable partner, not a guessing game.
Understanding why accurate setting matters is crucial. When your timer is misaligned, it can lead to overcooking, undercooking, or inefficient watering schedules—each of which can have tangible consequences. For instance, in baking, even a few minutes can mean the difference between a fluffy loaf and a dense brick. In gardening, mistimed watering can stress plants or promote disease. The tradeoff is clear: precision requires attentiveness but pays off in reliable results.

Kitchen Timers for Cooking, Chef Cooking Timer Clock with Loud Alarm – 100% Mechanical Desk Timer – No Batteries Required – Magnetic Backing, Exquisite Stainless Steel Body – Countdown Reminder
HIGH-QUALITY MATERIAL: Our kitchen timer is constructed from premium 304 stainless steel, renowned for its exceptional durability and…
As an affiliate, we earn on qualifying purchases.
As an affiliate, we earn on qualifying purchases.
How to Set an Analog Dial Timer in 4 Easy Steps
- Check the current time: Use your phone or a clock nearby to verify the exact current time. This step is fundamental because all subsequent settings depend on an accurate reference point. Without confirming the current time, you risk setting your timer based on outdated or incorrect information, leading to errors that can cascade through your schedule.
- Align the timer’s reference point: Usually, there’s a marker or a specific point labeled “Now” or similar. Turn the dial to match this with the current time. This alignment ensures that your timer’s internal clock corresponds precisely to real-world time, which is essential for accurate scheduling. If this step is off, your timer’s programmed on/off times will be skewed, resulting in early or late activations.
- Set your desired on/off times: Turn the dial clockwise or counterclockwise to the times you want your device to turn on or off. Clicks or notches help lock these in place. It’s important to understand that the direction you turn can affect the internal gear mechanisms; turning slowly and smoothly prevents gear skipping or damage, which can cause inaccuracies over time. Use the notches as tactile feedback to confirm your settings are secure.
- Verify and switch modes: Make sure the timer is in the correct mode — often labeled “Auto,” “On,” or “Off” — and double-check your set times. Confirming the mode ensures the timer operates as intended, especially if it has multiple functions. A mismatch between mode and scheduled times can lead to unexpected operation, defeating the purpose of precise timing.
For example, if it’s 6:15 AM now, align the “Now” marker with 6:15 on the dial. If you want your oven to turn off at 7:00 AM, turn the dial clockwise until the 7:00 mark clicks into position. Remember, taking your time during each step minimizes errors and extends the lifespan of the timer.

60 Minute Wind Up Timer, Visual Mechanical Timer with Loud Alarm, Manual Countdown Timers for Classroom, Home, Study and Cooking (White)
【No Battery Required & Easy to Use】 The mechanical kitchen timer doesn’t require any batteries, it is energy…
As an affiliate, we earn on qualifying purchases.
As an affiliate, we earn on qualifying purchases.
Common Mistakes That Mess Up Your Timer’s Accuracy
- Forcing the dial: Turning too quickly can skip clicks or damage the gear mechanisms. When gears are forced, they can slip out of alignment or wear prematurely, leading to inaccurate settings over time. Turning slowly and steadily allows the internal gears to engage properly, preserving accuracy and prolonging the device’s life.
- Setting when the timer is active: Adjust the dial while the timer is in “On” mode instead of “Auto.” This can cause misalignments because the internal gear system might be engaged differently, making it difficult to set the correct times. Always switch to “Auto” mode before adjusting to ensure the internal mechanisms are in a neutral state.
- Ignoring the current time: Failing to verify the actual current time leads to setting errors, especially if your timer has a manual reference point. Without aligning the “Now” marker properly, your scheduled times will drift, causing early or late activation. This oversight can create confusion and disrupt your routine.
- Not locking the dial properly: Missing clicks or not confirming the setting can cause the timer to shift over time due to vibrations or accidental bumps. Ensuring each setting clicks into place and confirming the lock prevents unintended shifts, maintaining accuracy over repeated uses.
For example, if you set your timer at 10:00 AM but forget to match the actual current time, your schedule will be off by however much the mismatch is. Always double-check before setting, and consider re-verifying periodically to catch any drift caused by mechanical wear or accidental movement.

Orbit Mechanical Water Timer – Adjustable Irrigation Shutoff for Lawn & Garden Watering – Battery-Free Clockwork Hose Faucet Timer with Easy Grip Dial & Manual Bypass – 62034
Effortless Watering Automation: The Orbit Mechanical Water Timer helps manage lawn and garden irrigation with a reliable mechanical…
As an affiliate, we earn on qualifying purchases.
As an affiliate, we earn on qualifying purchases.
Comparing Mechanical and Electromechanical Timers
| Feature | Mechanical Timers | Electromechanical Timers |
|---|---|---|
| Design | Gears, springs, simple dial | Mechanical parts + electrical contacts |
| Accuracy | Within a few minutes, with proper setting | Similar, slightly more durable |
| Durability | Long-lasting but wear over time | More resistant to wear and tear |
| Ease of Use | Simple dial, manual setting | Same, but often with more precise control |
| Best For | Home baking, gardening, basic automation | Industrial, commercial, or high-use settings |
Both types work well for home use, but electromechanical timers tend to last longer and offer slightly better durability. Your choice depends on your needs and how often you plan to use the timer.

Searon Kitchen Timers for Cooking, Mechanical Wind Up Timer with Loud Ring, Magnetic Back, No Battery Needed, Stainless Steel Countdown Timer for Cooking and Baking
[Mechanical Wind Up Kitchen Timer for Cooking & Baking] Ideal for meal prep, eggs, tea, baking, and daily…
As an affiliate, we earn on qualifying purchases.
As an affiliate, we earn on qualifying purchases.
How to Maintain and Troubleshoot Your Timer for Best Performance
Keeping your analog timer in top shape is simple but essential. Dust the dial regularly with a soft cloth, and avoid forcing the dial if it seems stuck. If it doesn’t turn smoothly, it might need cleaning or lubrication — but only if you’re comfortable opening the case.
If your timer isn’t turning on or off at the right times, double-check the setting, and verify the current time. Mechanical parts can wear out; if the gear teeth are worn or broken, replacing the device or parts is best. For persistent issues, consult a professional or the manufacturer’s instructions.
For example, a gardener noticed her timer was lagging by 10 minutes after a year of use. A quick cleaning of the gear mechanism restored accuracy. Regular maintenance keeps your timers working reliably for years.
Frequently Asked Questions
How do I know if my timer is set correctly?
Check the current time on your phone or clock, then align the timer’s “Now” marker with that time. Afterward, set your desired on/off times and verify they are correctly positioned. A quick test run can confirm everything’s in sync.
Can I change the timer’s schedule easily?
Yes. Simply rotate the dial to new times, making sure it clicks or locks into place. Always double-check the current time before re-setting to avoid errors.
Why does my timer sometimes turn on or off early or late?
This often results from misalignment, mechanical wear, or setting mistakes. Regular maintenance and careful setting help keep your timer accurate. If issues persist, inspect for worn parts or consider replacing the device.
Are analog timers still worth using in the age of digital gadgets?
Absolutely. They’re simple, durable, and don’t rely on batteries or Wi-Fi. For basic timing needs, especially in the kitchen or garden, a well-maintained analog timer remains a dependable tool.
What safety precautions should I take when maintaining my timer?
Always disconnect power before opening or cleaning the timer. Use gloves and eye protection if you’re lubricating internal parts. If you’re unsure about repairs, consult a professional to avoid damage or injury.
Conclusion
Remember, a well-set analog timer is a simple device that can save you countless minutes and prevent kitchen mishaps. The key is patience — take your time aligning the dial, verifying the current time, and locking your settings in place. With just a little practice, you’ll master perfect timing every time.
Next time you set that timer, think of it as tuning a musical instrument — a small effort for perfect harmony in your kitchen or garden.